Okay to answer you question Aziza the Yaby Liquid Foundation colours in my kit are:
On the Yellow side: Buff, Pecan and Caramel
Apparently Buff is the MUST have colour for the yellow side b/c it's a very common colour for white girls and it's mixed in w/ a lot of the other colours to adjust them. Liz (Yaby creator) herself told me that Buff and Pecan can be mixed together w/ different amounts of each colour to make a range of colours.
There is one shade lighter then Buff but I have the Face Atelier 0- Foundation Adjuster so if I need to go lighter I just add a drop of that. Remember you can mix different types and brands of foundations together to get different consistencies and different coverages. If you think your cream foundation is a bit heavy or matte mix a bit of Face Atelier or something similar w/ it to make it a bit lighter or dewy.
On the Pink side: Vanilla, Peach Cream, Almond Butter
Peach Cream and Almond Butter are apparently great colours for men b/c they do tend to have more pink in their skin. Also if you think some of the colours are a bit too pink you can always cut them w/ a little something from the yelllow side. Some colours like Rubarb (which I don't have) look very pink but I think they are more for adjusting then for use on their own.
I also have Cherry Blossom which is a colour adjuster to add more pink but I actually use it more as a natural looking cream blush. It gives a great rosy glow to the cheeks.
Liz also has other liquid adjusters which are very useful: White - make lighter, Blue - Neutralize Orange (bit too much fake tan), Purple - Neutralizes sickly yellow skin, Green - for those pesky red zits or rosacea and Apricot - great for the under eye area.
I should also mention that Liz does have a large range of colours for darker skintones. Caramel being the darkest shade on the yellow side, Chocolate Chip being the darkest on the pink side and Hot Fudge is a dark neutral shade. At this time I don't work w/ a lot of girls w/ darker skintones so I'm waiting to get some of the other darker shades. When I was working w/ Liz at the makeup show there was one very dark black girl who came to the booth and Chocolate Chip was a perfect match for her...she was quite surprised not only at the match but at the price!
I have started using Yaby liquid Foundation on myself everyday and I love it. I'm Honey w/ a bit of Buff lol.

The REAL Life & Work of a Professional Freelance Makeup Artist!
Wednesday, December 30, 2009
Tuesday, December 29, 2009
Kit Organizing!
So for x-mas I got a new makeup kit from my bf Alistair! Thank God b/c my other one was literally falling apart. It was actually quite embarrassing and had been ripping at the seams pretty much from the first wk I got it. It was like a Frankenkit w/ all the ghetto stitching I had sewn on it. My old kit if anyone is interested was the MUFE Professional Bag which was great b/c it was lightweight, clothe over the shoulder bag w/ lots of pockets which I like b/c I do take public transportation so I pack light but the stitching just isn't reinforced enough...apparently it's a big prob w/ the bag I found out from MUFE (they ended up giving me the bag for free b/c they didn't have any in stock when it ripped at first for me and I was leaving for Shanghai).
The new one is a bit heavier but it does seem a lot sturdier and well made but it is still an over the shoulder style bag. I have a ton of room in it and I think for a lot of simple jobs I might be able to pack light and carry a small hair kit in it too! It comes w/ trays in the bottom section but I personally took them out and I'm just putting pouches w/ stuff in there (one good thing I kept from the MUFE bag was all the removable pouches). It's from Yazmo.com if anyone is interested and they sell a ton of great makeup kits whatever your style is.
So I took a bunch of pics of kit so anyone that is interested can see how I pack for a shoot and the kinds of products I like to take w/ me. The stuff I'm showing in the pics is a lot of makeup for me and truthfully most of the time I wouldn't pack all this stuff...as mentioned before I usually like to keep it as light as possible and pack for that specific job if at all possible.
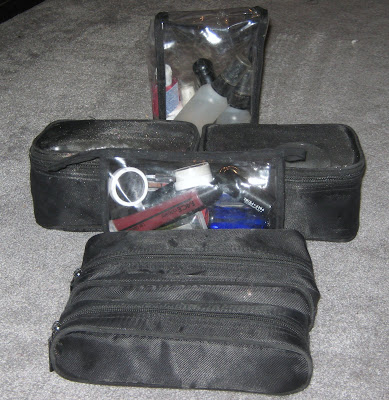
My Kit
 The empty bottom where I took out the trays
 One of the side pockets. If I do bring hair stuff in this kit this will be a good pocket...otherwise might use it for cellphone, water, apple etc.
 Packed Kit
 Inside the top of my Kit
 Pouches in the Bottom Container (where trays were originally). Can you tell I like Yaby already lol. Seriously condensed my kit SOOO MUCH! I Normally wouldn't bring all the palettes in the pouch to EVERY shoot.
 Brush Pouch
 Big Pouch #1 - Yaby Palettes and MUFE Flash Palette - 3 Yaby Powder Foundation Palettes (Light, Med, Dark) and Highlighting Palette (Love). 1 Homemade Lip Palette (just took all my lipsticks, cut and smooshed them into empties and put them in a Yaby Freestyle Palette (many different brands). 1 Freestyle palette w/ Yaby Blush and 2 Nixie Blushes w/ a few old MAC Shadows. 3 Eyeshadow Palettes - The one on the far Right is my Neutrals Working Palette w/ cake liners and eyebrow colours too. The others are more fun. They are all a mix of Yaby shadows (pearl paint and reg) and I pressed a bunch of OCC, Face Atelier and Fyrinnae pigments into shadows...plus there's a few old MAC shadows.
 Big Pouch #2 - Foundation Pouch - I have another pouch inside that one which holds my Face Atelier Foundations and my Keromask Consealers. 2 RCMA Palettes (which to be honest I don't use that much). Graftobian and Cinema Secrets Palettes and Yaby Liquid Foundations.
 Side Pouch Randoms - Mixing Palette, MAC Brown Shadow Palette, Blush Palette w/ La Femme and Nixie Blushes. Benefit Leg Moisturizer (creates a nice sheen on the legs and smells nice :) ). Not shown but also carry hand towel and wipes here too.
 Pouches inside the top section of the kit...and there's still more room!
 Small Black Pouch - Random Tools - Eyelash Curler, Tweezers, Sharpener, Nail File, Disposables (Lip/Mascara/Spatulas), Scissors, Eyelash/Eyebrow Comb, Tide Stick, Eyebrow Razors Etc.
 Bigger Black Pouch - Eye Stuff - Mascara - Black, Clear, Brown, Face Atelier Transforming Gel, Under Eye Brighteners - Benefit and Smashbox, Urban Decay Primer, DUO Eyelash Glue, MAC Matte and Glossy Gel, Fyrinnae Eye Primer and Pixie Epoxy (helps glitter stick)
 Lip Pouch - Face Atelier Lip Gloss, OCC Lip Tar in Clear and OCC Lip Balm in Tarred and Feathered, MUFE Glossy Full, Random Smashbox Lip Palette, Face Atelier Lip Putty and Lip RX, 2 Graftobian Lip Palettes, MAC Lip Exfoliater and Benefit She-Laq

Med Black Mesh Pouch #1 - OCC Lip Tars - Black/White and Primary Colours, Alcone Sponges, Smashbox and Benefit Luminizers, Eyelashes, Camera Ready Cosmetics Cream Blush Wheel and Empty Bowl
 Med Black Mesh Pouch #2 - Nail Polisher Remover Pads, Makeup Remover Wipes, Eye Makeup Remover, Q-Tips, Various Primers - MUFE, Fyrinnae (Cream and Powder) and Benefit, Cotton Pads, Makeup Puffs, Yaby Translucent Powder, Eyedrops, Mouth Wash, Mini Sewing Kit, Embryolisse Moisturizer, Vaseline, MAC Strobe Cream Etc.
 Liquids Pouch - 99% Alcohol, Water, Toner, Glycerin, Final Seal, Brush Cleaner, Hand Sanitizer, MUFE Elixir, MAC Fix + Etc.
 Okay so that's EVERYTHING in my kit...and I'm not lying there is still a lot of room in there! Plus like I said before I normally wouldn't bring ALL of this stuff to every shoot. I highly suggest everyone condense their kits...it just makes everything quicker to find and therefore you are quicker on set. I really don't even know what I would do w/ a rolling kit anymore...I don't know if I could fill it lol!
The new one is a bit heavier but it does seem a lot sturdier and well made but it is still an over the shoulder style bag. I have a ton of room in it and I think for a lot of simple jobs I might be able to pack light and carry a small hair kit in it too! It comes w/ trays in the bottom section but I personally took them out and I'm just putting pouches w/ stuff in there (one good thing I kept from the MUFE bag was all the removable pouches). It's from Yazmo.com if anyone is interested and they sell a ton of great makeup kits whatever your style is.
So I took a bunch of pics of kit so anyone that is interested can see how I pack for a shoot and the kinds of products I like to take w/ me. The stuff I'm showing in the pics is a lot of makeup for me and truthfully most of the time I wouldn't pack all this stuff...as mentioned before I usually like to keep it as light as possible and pack for that specific job if at all possible.
My Kit
 The empty bottom where I took out the trays
 One of the side pockets. If I do bring hair stuff in this kit this will be a good pocket...otherwise might use it for cellphone, water, apple etc.
 Packed Kit
 Inside the top of my Kit
 Pouches in the Bottom Container (where trays were originally). Can you tell I like Yaby already lol. Seriously condensed my kit SOOO MUCH! I Normally wouldn't bring all the palettes in the pouch to EVERY shoot.
 Brush Pouch
 Big Pouch #1 - Yaby Palettes and MUFE Flash Palette - 3 Yaby Powder Foundation Palettes (Light, Med, Dark) and Highlighting Palette (Love). 1 Homemade Lip Palette (just took all my lipsticks, cut and smooshed them into empties and put them in a Yaby Freestyle Palette (many different brands). 1 Freestyle palette w/ Yaby Blush and 2 Nixie Blushes w/ a few old MAC Shadows. 3 Eyeshadow Palettes - The one on the far Right is my Neutrals Working Palette w/ cake liners and eyebrow colours too. The others are more fun. They are all a mix of Yaby shadows (pearl paint and reg) and I pressed a bunch of OCC, Face Atelier and Fyrinnae pigments into shadows...plus there's a few old MAC shadows.
 Big Pouch #2 - Foundation Pouch - I have another pouch inside that one which holds my Face Atelier Foundations and my Keromask Consealers. 2 RCMA Palettes (which to be honest I don't use that much). Graftobian and Cinema Secrets Palettes and Yaby Liquid Foundations.
 Side Pouch Randoms - Mixing Palette, MAC Brown Shadow Palette, Blush Palette w/ La Femme and Nixie Blushes. Benefit Leg Moisturizer (creates a nice sheen on the legs and smells nice :) ). Not shown but also carry hand towel and wipes here too.
 Pouches inside the top section of the kit...and there's still more room!
 Small Black Pouch - Random Tools - Eyelash Curler, Tweezers, Sharpener, Nail File, Disposables (Lip/Mascara/Spatulas), Scissors, Eyelash/Eyebrow Comb, Tide Stick, Eyebrow Razors Etc.
 Bigger Black Pouch - Eye Stuff - Mascara - Black, Clear, Brown, Face Atelier Transforming Gel, Under Eye Brighteners - Benefit and Smashbox, Urban Decay Primer, DUO Eyelash Glue, MAC Matte and Glossy Gel, Fyrinnae Eye Primer and Pixie Epoxy (helps glitter stick)
 Lip Pouch - Face Atelier Lip Gloss, OCC Lip Tar in Clear and OCC Lip Balm in Tarred and Feathered, MUFE Glossy Full, Random Smashbox Lip Palette, Face Atelier Lip Putty and Lip RX, 2 Graftobian Lip Palettes, MAC Lip Exfoliater and Benefit She-Laq
Med Black Mesh Pouch #1 - OCC Lip Tars - Black/White and Primary Colours, Alcone Sponges, Smashbox and Benefit Luminizers, Eyelashes, Camera Ready Cosmetics Cream Blush Wheel and Empty Bowl
 Med Black Mesh Pouch #2 - Nail Polisher Remover Pads, Makeup Remover Wipes, Eye Makeup Remover, Q-Tips, Various Primers - MUFE, Fyrinnae (Cream and Powder) and Benefit, Cotton Pads, Makeup Puffs, Yaby Translucent Powder, Eyedrops, Mouth Wash, Mini Sewing Kit, Embryolisse Moisturizer, Vaseline, MAC Strobe Cream Etc.
 Liquids Pouch - 99% Alcohol, Water, Toner, Glycerin, Final Seal, Brush Cleaner, Hand Sanitizer, MUFE Elixir, MAC Fix + Etc.
 Okay so that's EVERYTHING in my kit...and I'm not lying there is still a lot of room in there! Plus like I said before I normally wouldn't bring ALL of this stuff to every shoot. I highly suggest everyone condense their kits...it just makes everything quicker to find and therefore you are quicker on set. I really don't even know what I would do w/ a rolling kit anymore...I don't know if I could fill it lol!
Tuesday, December 22, 2009
In Beauty Update
Some ppl are curious where I got the magazine in Toronto. The location I got it at was an International Press Mag Shop one Block East of Bathurst on Bloor. I'm pretty sure it will be sold out there now though b/c they only had 2 copies and I've mentioned it to a few ppl. The distributor in Toronto is a guy named Frank. Super nice and his email is: fursino@speedimpex.ca . Outside Toronto it gets a bit harder but you can email the actual magazine and they can help you find a distributor near you. The magazine's email is: instyle.fashion@msa.hinet.net .
Hope that helps everyone and hope everyone has a Happy Holiday!!
Hope that helps everyone and hope everyone has a Happy Holiday!!
Friday, December 18, 2009
In Beauty Magazine
 I FINALLY got my copy of In Beauty Spring/Summer 10 Magazine. For those of you that don't know In Beauty is LITERALLY my makeup and hair beauty bible for the fashion seasons. Stumbling upon the premiere issue last yr was literally one of the best things to happen to me as far as research and expanding my ideas for makeup/hair trends.
Basically, it's a magazine that gives detailed explanations and close up pictures of all the important runway shows in Milan, Paris, London and New York. It's so great to have these pictures as references b/c a lot of times when you look at the runway pics after the shows you can't see the makeup and hair up close enough to see all the details and nuances b/c let's be real the main focus of these shows are the clothes lol.
The magazine is a bit pricey at $45 CAN but for me it is worth every penny and MORE! Seriously, it's a magazine of pure gold...every page is just more and more inspiration. I'm so glad I came across it by pure luck that first time and actually bought it.
It's always a guessing game when trying to figure out when this magazine will come out b/c it only comes out twice a year a few mths after the runway shows and it's VERY hard to find in stores b/c 1. Not many stores carry the magazine 2. The stores that do only carry like 1 or 2 copies 3. It's becoming a big magazine for makeup artists to buy
Thankfully, I'm persistent and even when I was working in China I had good friends go find a copy for me. The magazine is actually made in Taiwan so I had to contact them and they told me when it was coming out and put me in touch w/ the very friendly and patient distributor in Toronto who even had a copy sent to a store personally for me b/c there were no more it stores at the time.
So if you do happen to stumble upon this little gem I say BUY IT! BUY IT NOW!!
Thursday, December 3, 2009
My Magic Wand!
Today I was doing a model portfolio building shoot for this really nice actress/model that contacted me - Shirleyann Mason. Basically we wanted to get 6 different looks done throughout the shoot. Up until now she's mostly just acted but wants to possibly get into doing some work in Japan so she needed to build a modeling portfolio and fast. The girl is a NATURAL.
Anyway, I don't know why I never mentioned this item before b/c it is seriously like my magic curling wand. EVERY time I use it on set everyone ohhs and awws over it and LOVES the results. Plus it's so much easier and quicker (at least for me) to use then a regular curling iron. It seriously makes me look like I'm much better at hair then I am lol...and today was definitely NO exception.
My magic wand is my Cortex Curling Tong! I got it on Ebay and seriously I'm in love! There are way more expensive versions out there too but this one works fine for me. Comes w/ a glove too so you can wrap the hair around the wand w/out burning your fingers (which I have done OUCH).
 As you can see it doesn't have the clamp of a regular curling iron. You just take the hair and w/ the glove on wrap the hair around the wand and hold...so simple!
So the following pics are just some behind the scenes pics I took throughout the shoot...she looked way better then these pics give credit for but I just want to show the variety of hairstyles I was able to get w/ just curling the hair ONCE and then just changing the curl and style throughout the shoot.
The first look was just really natural no makeup/makeup natural hair. The second look was when I first curled the hair. We were going for a really doll like look. I put her hair into a really pretty high ponytail (I also learned how to do that perfect clean coveted ponytail recently..a real hard thing for a lot of makeup artists). Then I curled the tail into pretty little ringlets.
 After that look I pulled all the ringlets apart so that it was just a huge ponytail of curls and then I pinned it to the side and changed the makeup.
 Next w/out touching up the hair AT ALL. I just took out the pins and ponytail. Switched to a smokey eye and this is the hair I got - GORGEOUS!

 Next I went really high fashion. Dark eyes - Dark Lips and really contoured cheek bones. I slicked back the top of the hair and then frizzed out the curls around the neck. These pics don't illustrate the slicked back part of the hair that well as they were taken between takes but I'm sure you can get the idea lol.

 The final look was just thrown in last minute and I just teased the hell out of the curls...the same curls that I did hours ago w/ that tong! Look at how many TOTALLY different looks I got out of ONE curling application!
 Who would have thought those clean little ringlets in the first pic could be transformed into this!
Anyway, I don't know why I never mentioned this item before b/c it is seriously like my magic curling wand. EVERY time I use it on set everyone ohhs and awws over it and LOVES the results. Plus it's so much easier and quicker (at least for me) to use then a regular curling iron. It seriously makes me look like I'm much better at hair then I am lol...and today was definitely NO exception.
My magic wand is my Cortex Curling Tong! I got it on Ebay and seriously I'm in love! There are way more expensive versions out there too but this one works fine for me. Comes w/ a glove too so you can wrap the hair around the wand w/out burning your fingers (which I have done OUCH).
 As you can see it doesn't have the clamp of a regular curling iron. You just take the hair and w/ the glove on wrap the hair around the wand and hold...so simple!
So the following pics are just some behind the scenes pics I took throughout the shoot...she looked way better then these pics give credit for but I just want to show the variety of hairstyles I was able to get w/ just curling the hair ONCE and then just changing the curl and style throughout the shoot.
The first look was just really natural no makeup/makeup natural hair. The second look was when I first curled the hair. We were going for a really doll like look. I put her hair into a really pretty high ponytail (I also learned how to do that perfect clean coveted ponytail recently..a real hard thing for a lot of makeup artists). Then I curled the tail into pretty little ringlets.
 After that look I pulled all the ringlets apart so that it was just a huge ponytail of curls and then I pinned it to the side and changed the makeup.
 Next w/out touching up the hair AT ALL. I just took out the pins and ponytail. Switched to a smokey eye and this is the hair I got - GORGEOUS!
 Next I went really high fashion. Dark eyes - Dark Lips and really contoured cheek bones. I slicked back the top of the hair and then frizzed out the curls around the neck. These pics don't illustrate the slicked back part of the hair that well as they were taken between takes but I'm sure you can get the idea lol.
 The final look was just thrown in last minute and I just teased the hell out of the curls...the same curls that I did hours ago w/ that tong! Look at how many TOTALLY different looks I got out of ONE curling application!
 Who would have thought those clean little ringlets in the first pic could be transformed into this!
Wednesday, December 2, 2009
My Fyrinnae Order FINALLY Arrived!
So about a mth ago I ordered from Fyrinnae . For a long time now I've wanted to check out their loose eye shadows which I've heard are AMAZING. So finally I ordered about 20 eye shadow samples (hard to get the amount down there are SOO MANY great ones!), 5 mineral blushes, a powder primer and a silica primer along w/ eye lid primer, pixie epoxy (good for glitter and shimmery shadows) and a pigment modifier that helps w/ pigment pressing (which I'll be doing a video on in the near future :) ). The great thing is how affordable everything is...I mean even shipping internationally to Canada was FREE (that never happens). The sucky thing was waiting! I knew the orders took up to two wks to be shipped but then it took an additional two and half wks to get here (apparently that's rare) but it finally did and I'm so EXCITED to try everything out. I wanted to use some of these colours on the shoot I had over the weekend but unfortunately that wasn't a possibility b/c they weren't here yet :(
So I've done some swatches on my arm of a few colours. I'll do some today and I'll do some more over the next couple of days. In the pics the LEFT side is applied w/ a damp brush for a foiled wet look and the RIGHT side is applied w/ a dry brush. The Left side really pops in the pics and the Right side looks more subtle but also remember this is a point and shoot camera it doesn't really show it's true beauty.
The first one is Dragonskin (great green w/ gold flecks)
 Jade Ghost - Pic doesn't do it justice...one of my favs actually (shimmery white w/ mint green sheen)
 Digital Faerie - I love this one wet!
 Biker Chic - Black w/ blue sparkles - I think this will be great for a smokey eye!
 Electro-Koi - Gorgeous Orange w/ gold shimmer - I think this was the colour I was most surprised about how much I liked it!
 Wicked - It photographs Blue but it's actually Purple w/ Teal shimmer...very pretty!
 Equality - I think dry this will be a great layering colour - I know you can't see but it's kind of a shimmery silver/taupe w/ multi colour sparkles
 Immortality - Black w/ multi colour sparkles
 The last one I'm showing today is actually more of a glitter - Lights of Moscow. I put it on dry and over the pixie epoxy I mentioned earlier. I definitely suggest putting a sticky base of some sort underneath it or applying it wet just so it sticks to the eye.
 I'll post more tomorrow if I have time...I have a shoot tomorrow so I'll have to see :)
So I've done some swatches on my arm of a few colours. I'll do some today and I'll do some more over the next couple of days. In the pics the LEFT side is applied w/ a damp brush for a foiled wet look and the RIGHT side is applied w/ a dry brush. The Left side really pops in the pics and the Right side looks more subtle but also remember this is a point and shoot camera it doesn't really show it's true beauty.
The first one is Dragonskin (great green w/ gold flecks)
 Jade Ghost - Pic doesn't do it justice...one of my favs actually (shimmery white w/ mint green sheen)
 Digital Faerie - I love this one wet!
 Biker Chic - Black w/ blue sparkles - I think this will be great for a smokey eye!
 Electro-Koi - Gorgeous Orange w/ gold shimmer - I think this was the colour I was most surprised about how much I liked it!
 Wicked - It photographs Blue but it's actually Purple w/ Teal shimmer...very pretty!
 Equality - I think dry this will be a great layering colour - I know you can't see but it's kind of a shimmery silver/taupe w/ multi colour sparkles
 Immortality - Black w/ multi colour sparkles
 The last one I'm showing today is actually more of a glitter - Lights of Moscow. I put it on dry and over the pixie epoxy I mentioned earlier. I definitely suggest putting a sticky base of some sort underneath it or applying it wet just so it sticks to the eye.
Subscribe to:
Posts (Atom)